Your Mac’s network name forms part of its network address. If you want to share your Mac’s files and folders with other computers on your network you’ll need to know its network address so that those other computers can connect to it. This information is readily available in System Preferences, but this article looks at how to get your Mac’s network name using the command line.
Other computers on your network can connect to your Mac using any one of three network names: its Bonjour name, NetBIOS name and IP address. We’ll be using scutil, PlistBuddy, defaults, ipconfig and ping to get this information together with your Mac’s computer name and host name which – although not required to connect to your Mac – form part of the same system configuration data.
Table of Contents
1. Displaying the Bonjour Name
You can use either scutil or PlistBuddy to query your Mac’s Bonjour name stored in the file /Library/Preferences/SystemConfiguration/preferences.plist
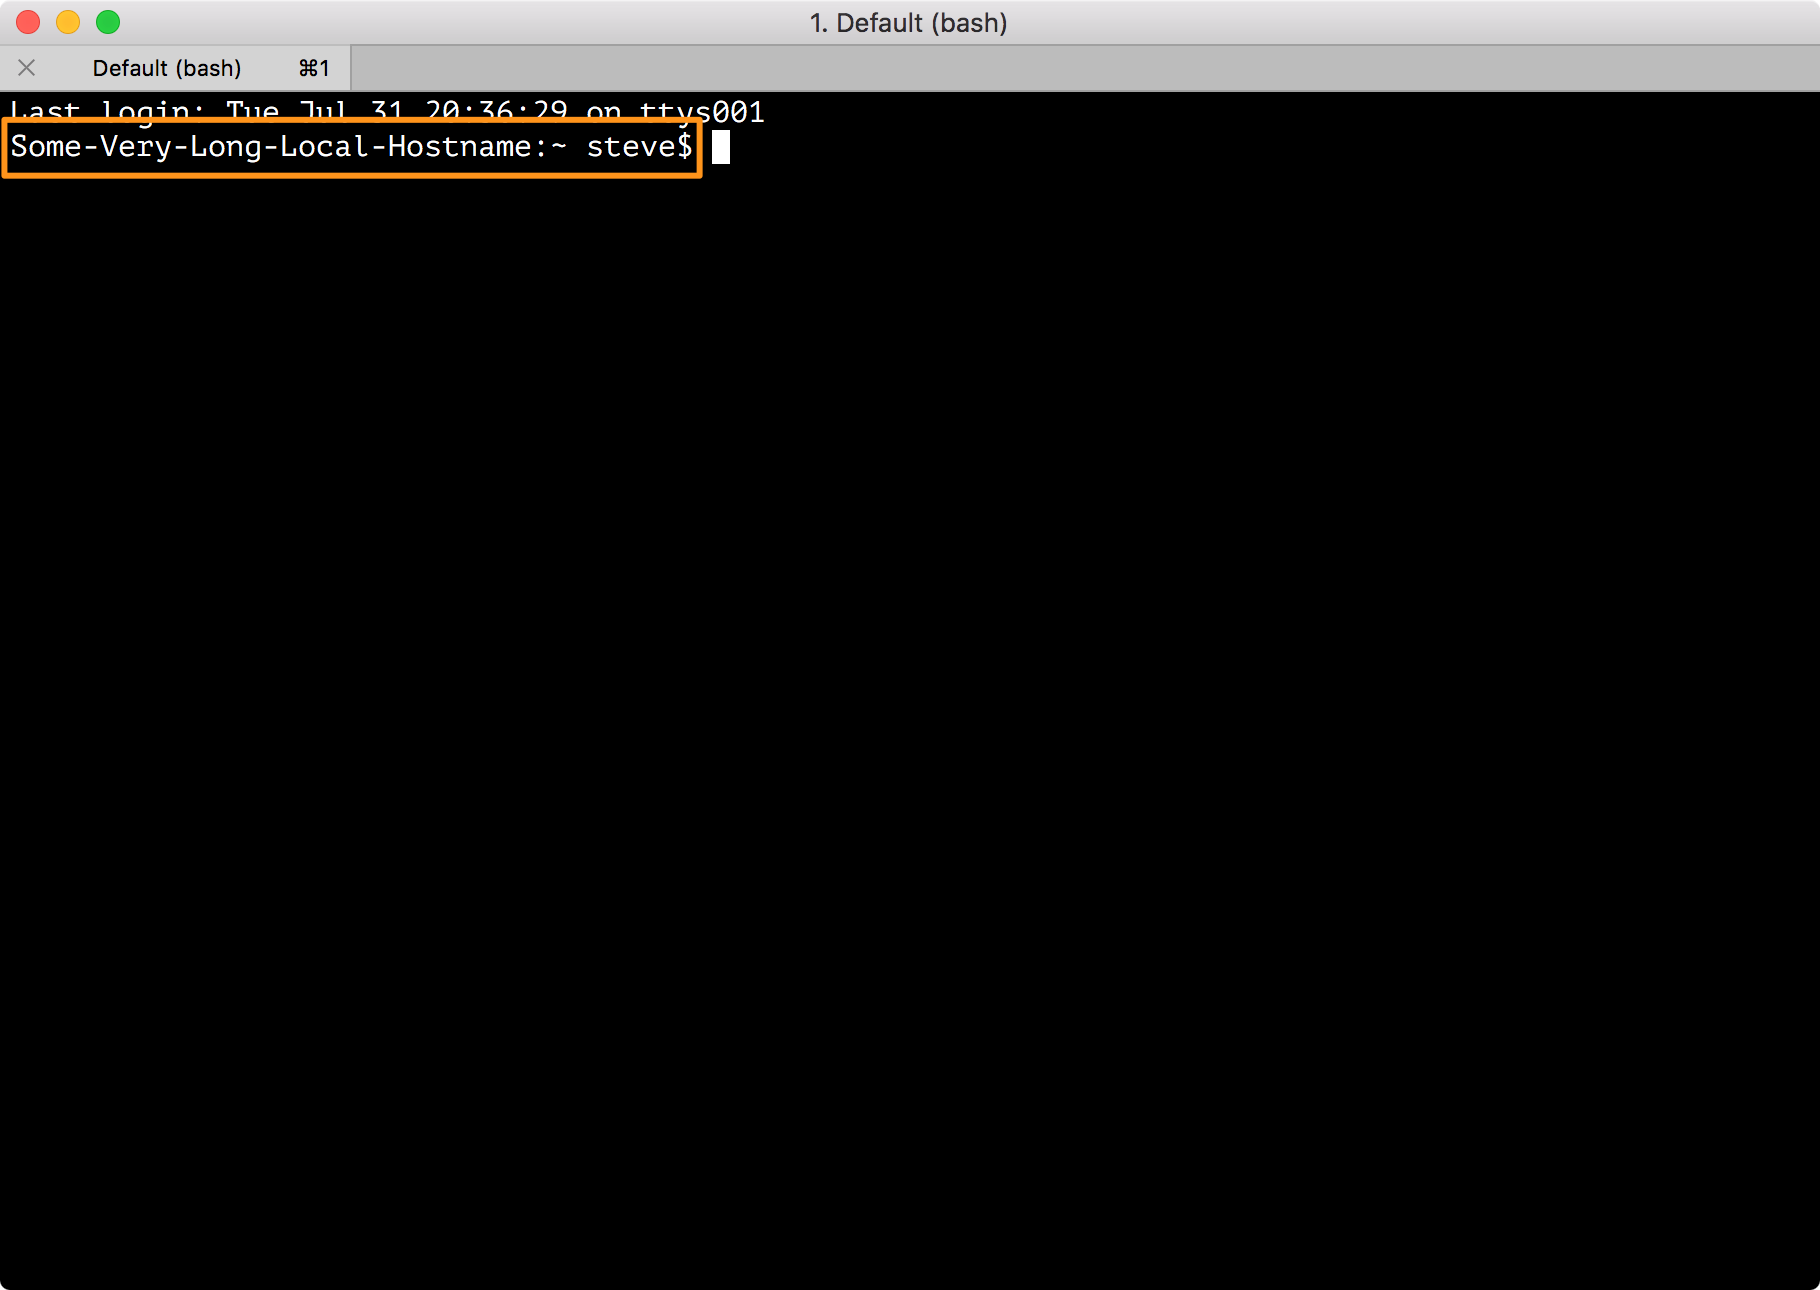
With scutil, in Terminal type:
scutil --get LocalHostName
Some-Very-Long-Local-Hostname
For PlistBuddy, in Terminal type:
/usr/libexec/PlistBuddy -c "Print :System:Network:HostNames:LocalHostName" /Library/Preferences/SystemConfiguration/preferences.plist
Some-Very-Long-Local-Hostname
The output of both commands is the same and requires a suffix of .local to make it a valid Bonjour name i.e. Some-Very-Long-Local-Hostname.local.
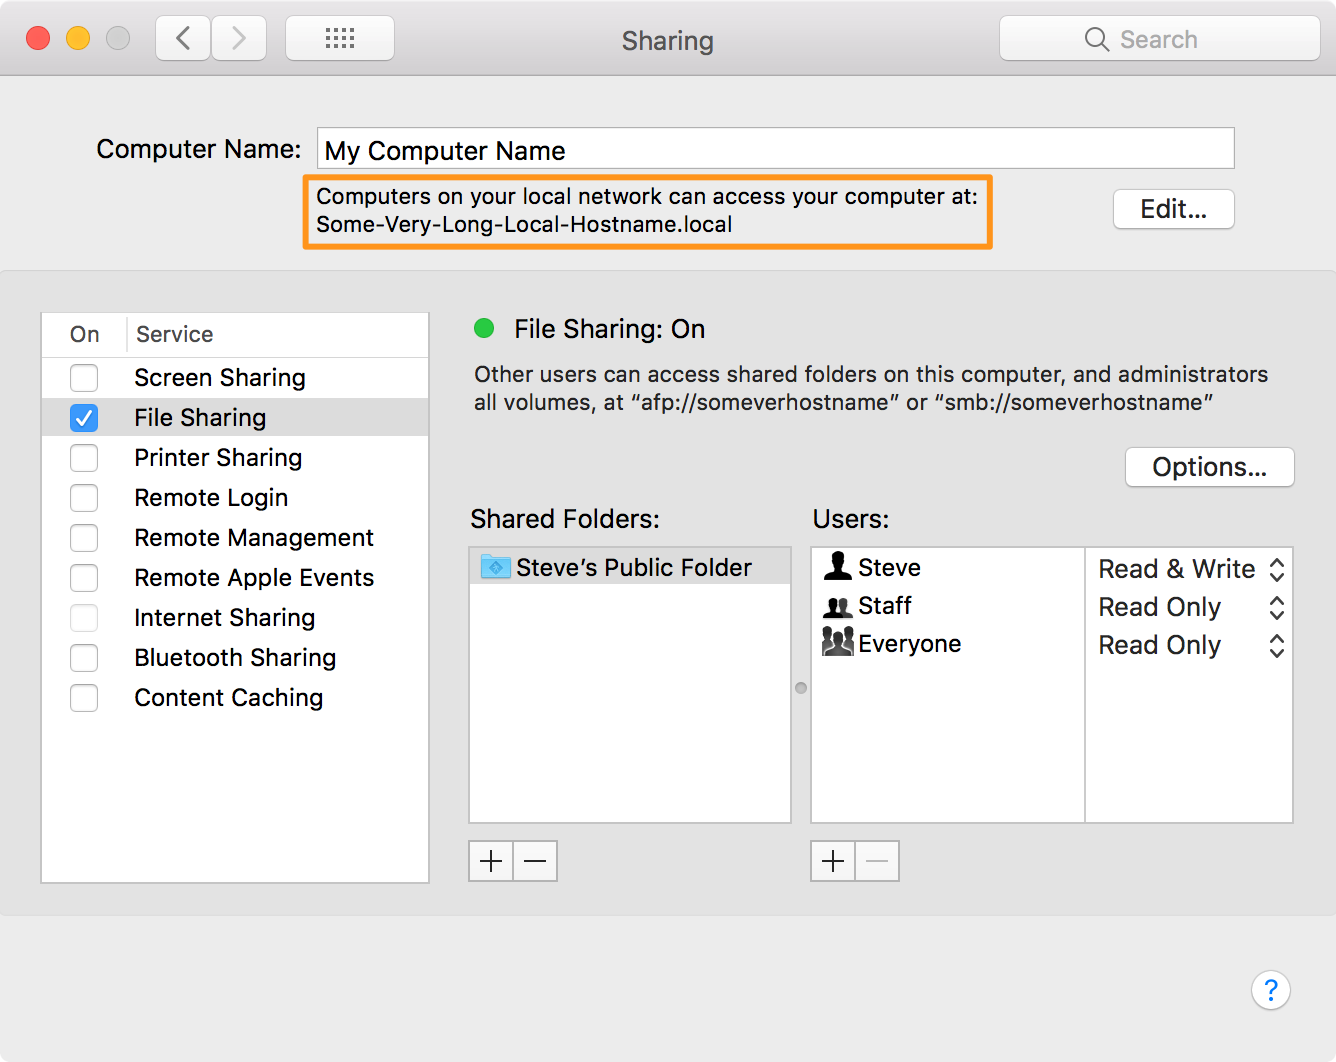
Alternatively, for the GUI equivalent select System Preferences
> Sharing:
2. Displaying the NetBIOS Name
As depicted in System Preferences
> Network > Advanced...
> WINS, the NetBIOS name consists of up to 15 characters and by convention is represented in uppercase:

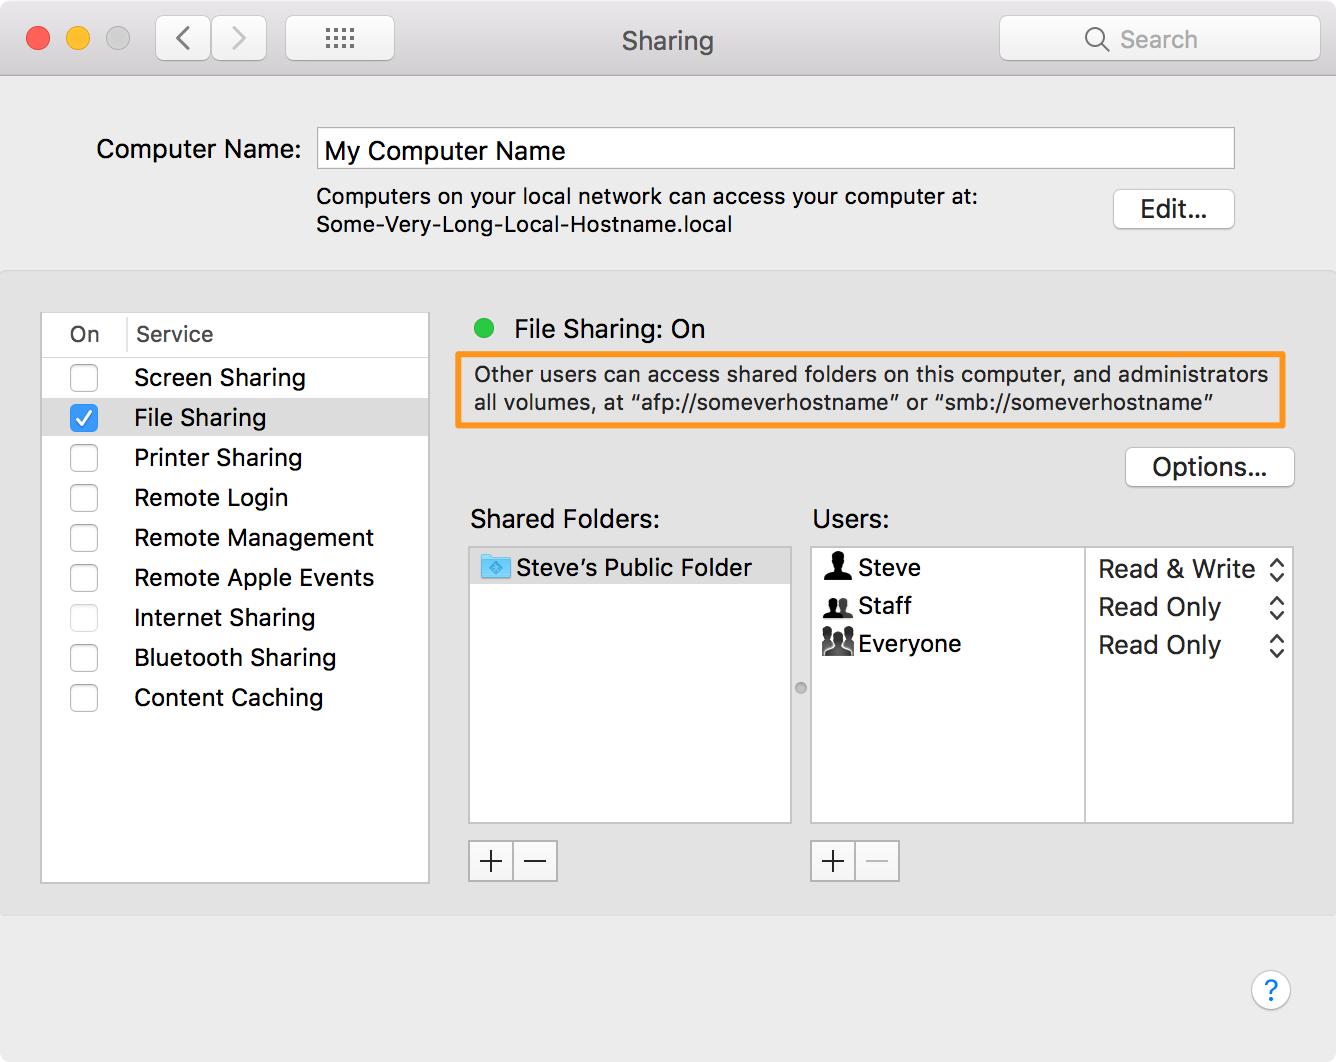
A lower case version of the NetBIOS name can also be seen as part of the afp:// and smb:// URLs in System Preferences > Sharing:
It is my understanding that the NetBIOS name in macOS exists mainly so that any Windows machines on your network can discover and connect to your Mac. However, it can also be used as part of your Mac’s network address that allows other Mac’s to connect to it.
It appears impossible to directly change the NetBIOS name permanently through either System Preferences or the command line with any changes not surviving a reboot. This may be down to your network’s router or macOS or a combination of both. Whatever the reason, the NetBIOS name appears to be derived from your Mac’s Bonjour name.
This perhaps oversimplified flow chart is my amateurish stab at how the system appears to derive the NetBIOS name from the Bonjour name:
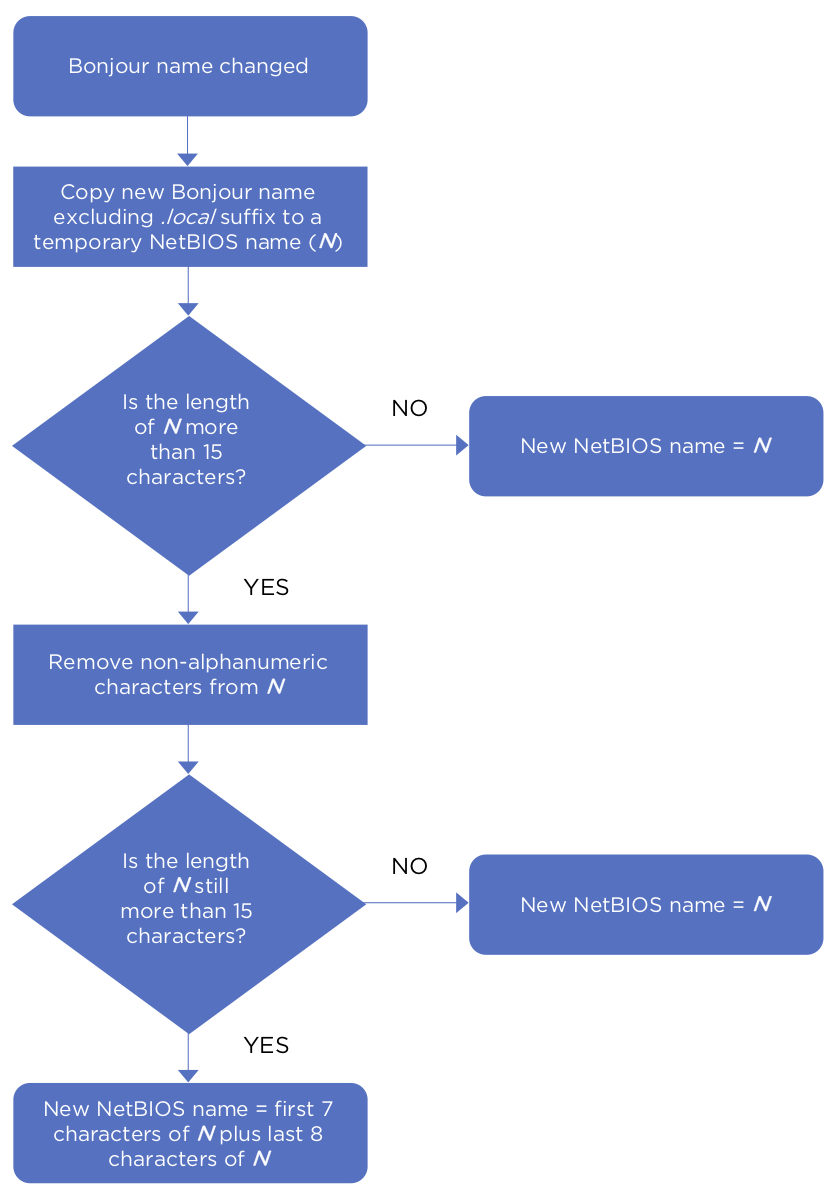
Following this logic the table below shows 3 Bonjour names of differing length and the NetBIOS name derived from them. I’ve included both the version of the NetBIOS name shown in System Preferences and that queried from the command line for as we’ll see shortly they differ in letter case:
| Bonjour Name | NetBIOS Name (System Preferences) |
NetBIOS Name (Command Line) |
|---|---|---|
| My–MacBook–Pro.local | MY–MACBOOK–PRO | My–MacBook–Pro |
| Janes–MacBook–Pro.local | JANESMACBOOKPRO | JanesMacBookPro |
| Some–Very–Long–Local–Hostname.local | SOMEVERHOSTNAME | SomeVerHostname |
You can use either defaults or PlistBuddy to query your Mac’s NetBIOS name stored in /Library/Preferences/SystemConfiguration/com.apple.smb.server.plist
For defaults, in Terminal type:
defaults read /Library/Preferences/SystemConfiguration/com.apple.smb.server NetBIOSName
SomeVerHostname
For PlistBuddy, in Terminal type:
/usr/libexec/PlistBuddy -c "Print :NetBIOSName" /Library/Preferences/SystemConfiguration/com.apple.smb.server.plist
SomeVerHostname
3. Displaying the IP Address
You can use either ipconfig or ping to get your Mac’s IP address.
For ipconfig, in Terminal type:
ipconfig getifaddr en0
192.168.1.75
NOTE: If you don’t see any output using en0 then try en1. One of these interfaces will be for the Wi-Fi port the other for the Ethernet port. Which interface is used for which port is decided by your Mac and which interface has your network IP address is ultimately determined by if your Mac connects to your Network wirelessly or by Ethernet.
Having already gotten your Mac’s Bonjour name and NetBIOS name you can use these with ping to get the IP address.
Using the Bonjour name, in Terminal type:
ping -c1 Some-Very-Long-Local-Hostname.local | head -1 | grep -Eo '[0-9.]{4,}'
192.168.1.75
Using the NetBIOS name, in Terminal type:
ping -c1 SomeVerHostname | head -1 | grep -Eo '[0-9.]{4,}'
192.168.1.75
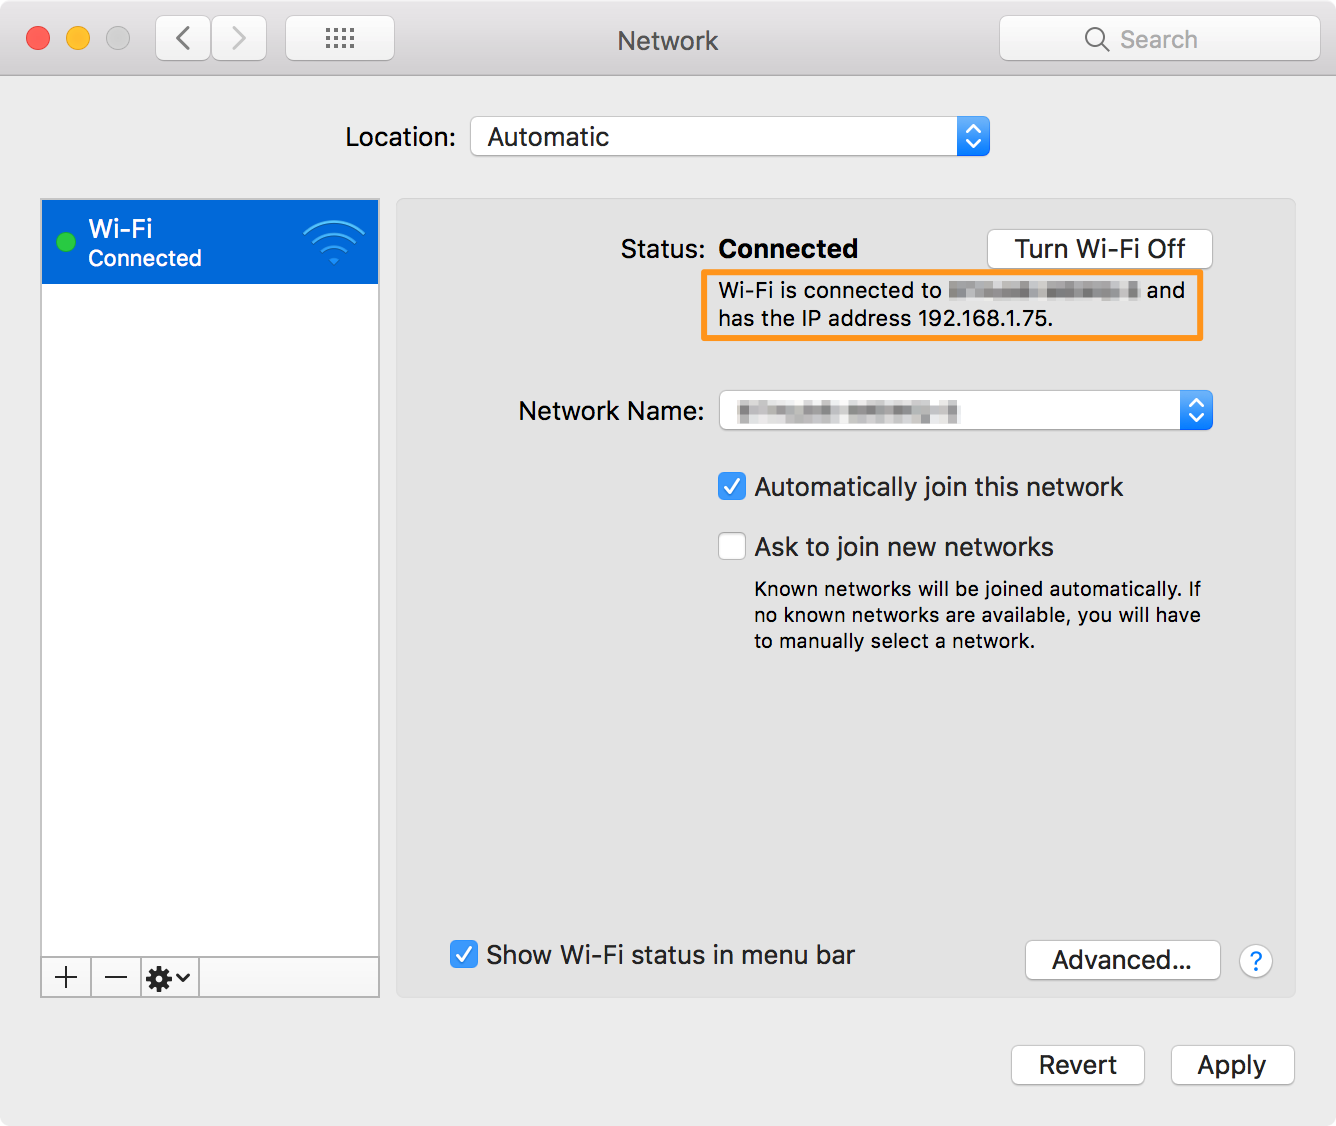
For the GUI equivalent select System Preferences > Network:
4. Displaying the Computer Name
Your Mac’s computer name is its user-friendly name. We can use scutil or PlistBuddy to retrieve it from /Library/Preferences/SystemConfiguration/preferences.plist.
With scutil, in Terminal
type:
scutil --get ComputerName
My Computer Name
For PlistBuddy, in Terminal type:
/usr/libexec/PlistBuddy -c "Print :System:System:ComputerName" /Library/Preferences/SystemConfiguration/preferences.plist
My Computer Name
To see the GUI equivalent select System Preferences > Sharing:

5. Displaying the Host Name
Your Mac’s host name should be familiar to you if you spend any time using Terminal as it normally forms part of the command prompt on the left of a Terminal window:
If you’ve configured Terminal not to show your Mac’s host name in the command prompt, you can use scutil, PlistBuddy or hostname to display it. For scutil, in Terminal type:
scutil --get HostName
Some-Very-Long-Local-Hostname
For PlistBuddy, in Terminal type:
/usr/libexec/PlistBuddy -c "Print :System:System:HostName" /Library/Preferences/SystemConfiguration/preferences.plist
Some-Very-Long-Local-Hostname
For hostname, in Terminal type:
hostname -f
Some-Very-Long-Local-Hostname
NOTE: The -f flag is optional as this is the default behaviour for the hostname command.
The value of HostName and LocalHostName are often the same, but they should not be confused as they can also be different. It’s important to remember that it’s the value of LocalHostName that constitutes your Mac’s Bonjour name, not the value of HostName.
Finally, we’ll take at look at changing your Mac’s Bonjour name, computer name and host name with the same utilities we used to display that information.
6. Changing the Bonjour Name
The following examples change your Mac’s Bonjour name to NewBonjourName. You should change this value accordingly before using the code.
With scutil, in Terminal type:
sudo scutil --set LocalHostName "NewBonjourName"
For PlistBuddy, in Terminal type:
sudo /usr/libexec/PlistBuddy -c "Set :System:Network:HostNames:LocalHostName NewBonjourName" /Library/Preferences/SystemConfiguration/preferences.plist
7. Changing the Computer Name
The following examples change your Mac’s computer name to New Computer Name. You should change this value accordingly before using the code.
With scutil, in Terminal type:
sudo scutil --set ComputerName "New Computer Name"
For PlistBuddy, in Terminal type:
sudo /usr/libexec/PlistBuddy -c "Set :System:System:ComputerName New Computer Name" /Library/Preferences/SystemConfiguration/preferences.plist
8. Changing the Host Name
The following examples change your Mac’s host name to NewHostName. You should change this value accordingly before using the code.
For scutil, in Terminal type:
sudo scutil --set HostName "NewHostName"
For PlistBuddy, in Terminal type:
sudo /usr/libexec/PlistBuddy -c "Print :System:System:HostName NewHostName" /Library/Preferences/SystemConfiguration/preferences.plist
I’ve deliberately omitted how to amend your Mac’s NetBIOS name and IP address. The NetBIOS name for reasons already stated and the IP address because it’s normally dynamically assigned by your network’s router. It’s possible to assign a static IP address but that entails accessing your router’s configuration which is beyond the scope of this article.
For years I’ve been trying to get the network name on the command line. This seems to work:
/System/Library/PrivateFrameworks/Apple80211.framework/Versions/Current/Resources/airport -I | grep ' SSID:'
@BillyBuggy,
Thanks. Wasn’t aware of this. You could also pipe it to awk to get only the network name:
/System/Library/PrivateFrameworks/Apple80211.framework/Versions/Current/Resources/airport -I | grep ' SSID:' | awk '{print $2}'
To be clear though, this returns the name of the network your Mac connects to. It’s not the name used to identify your Mac on the that network.
Regards, Steve.
Thank you for the command: sudo scutil –set HostName “NewHostName”
For some reason my hostname was different from the LocalHostName, and I couldn’t figure out how to update it.
Based on reading elsewhere, and just now successfully changing my NetBIOS name, here are steps that work:
1. In System Preferences > Sharing, turn off any sharing services you have turned on.
2. In System Preferences > Network, turn off your Wi-Fi network. (And disconnect from Ethernet, if you’re connected that way.) You want networking “turned off”.
3. Make the changes to the NetBIOS name in Advanced > WINS.
4. Click Save. Click Apply. Quit System Preferences, saving any changes.
5. Go back into System Preferences > Networking, and turn your networking back on. (Reversing step #2.)
6. Go back into System Preferences > Sharing, and re-enable any services you turned off. (Reversing step #1.)
Now check your NetBIOS name in the System Preferences > Networking pref pane, or via the command line commands documented in the above article. _Should_ be what you’re expecting. (Worked for me. Mac OS 11.1 (Big Sur))
@Alderete
Thanks for posting this. Unfortunately, using macOS Big Sur 11.1 this doesn’t work for me, but it may well help others.
Regards, Steve.
Great explanations. Thank you for this!
But how do I change the “NetBIOS-Name”?
This info is sadly missing here.
On my brand-new MacBook Pro the “NetBIOS-Name” for WINS (SMB) is displayed as “APPLE” (smb://apple) for what reasons so ever.
I would like to change it to “MACBOOK”. But all my attempts to set the “NetBIOS-Name” to “MACBOOK” were fruitless until now.
Sometimes I managed to set the “NetBIOS-Name” differently by playing around with turning Wi‑Fi on and off or the filesharing on and off, but at the latest after the next reboot it switches back to “APPLE”.
I’m trying to resolve this issue for days already and it’s slowly driving me crazy.
For any help in this matter I would be greatly thankful.
@Sem,
Unfortunately, my experience with attempting to permanently change the NetBIOS name is the same as yours. As mentioned, it appears to be derived from the Bonjour name, but your router and/or macOS play a big (hidden) part. Like you, I had some limited success with a combination of toggling file sharing and re-booting my router, but the results were inconsistent – repeating the “successful” steps in the same order never produced the same result. I eventually gave up trying for my own sanity.
Regards, Steve.
Thanks a lot Steve for your answer. Apparently I’m not alone fighting with this inadequateness of macOS. For me it’s even harder because it’s my very first Mac, thus I’m still an unexperienced beginner with macOS and have to learn everything piece by piece myself with the help of the Internet.
Well; In my initial post I forgot to mention that my attempts also included several reboots of the MacBook itself plus my router of course.
In my case the NetBIOS name can’t be derived from the Bonjour name. I used and checked all of your commands for the terminal. The results are as follows:
ComputerName = Stephans MacBook Pro
(Which is the default name created from the initial computer setup)
LocalHostName = MacBook-Pro
(This I configured myself in the GUI under Shares)
And the (nasty)…
NetBIOSName = Apple
The question for me is, where does my machine gets this name from? Where else is this NetBIOSName “Apple” configured?
Therefore, in my case, the NetBIOSName “Apple” clearly isn’t derived from the Bonjour name (which apparently is the same as the LocalHostName), because my LocalHostName is “MacBook-Pro”.
And now to the interesting part:
After using the 3 commands from your chapter “5. Displaying the Host Name” things got weird for me. Here are the results:
1.) scutil –get HostName
The result was:
HostName: not set
2.) /usr/libexec/PlistBuddy -c “Print :System:System:HostName” /Library/Preferences/SystemConfiguration/preferences.plist
The result was:
Print: Entry, “:System:System:HostName”, Does Not Exist
3.) hostname -f
And here the result was:
Apple
So I thought I should use your command to set the HostName to “MacBook” (sudo scutil –set HostName “MacBook”) which created a astonishing result on my machine. Because after that the NetBIOS name was initially “MACBOOK-PRO” and not “MACBOOK” as I had expected. But after a restart the NetBIOS name was again “Apple” or “APPLE”.
It is to despair!
I also will give up now, for my own sanity, exactly as you said. I ordered today a new Microsoft Laptop and will sell the brand new MacBook, because the here described issue isn’t by far the only one which annoys me with macOS. I better stick to Windows.
Thanks again and all the best to you.
Best regards